Light UP! The Challenge
The Royal Society of Chemistry and the Higher Education institutions involved in this project are not liable for the actions or activities of any reader or anyone else who uses the information in these resource pages or the associated materials. We assume no liability with regard to injuries or damage to property that may occur as a result of using the information contained in these resources. A full risk assessment must be carried out before undertaking any of the practical investigations contained in this website and associated resources. We advise teachers to refer to either the CLEAPSS website or SSERC website for up to date health and safety information when planning practical activities for children.
All materials are ©Royal Society of Chemistry and the Higher Education institution responsible for setting the challenge and are freely available to share for educational purposes. Whilst educators are free to adapt the resources to suit their own needs, acknowledgement of copyright on all original materials must be included. Rights to original images included in the resource are for the use of the Royal Society of Chemistry and the Higher Education institution responsible for setting the challenge only – as such, these images may only be used as part of this resource and may not copied into or used in other materials.
For this challenge, and to aid you in completing a full risk assessment, you will need to be aware of the following:
- Lasers can cause serious damage to eyes and should never be pointed directly into eyes or reflected off a surface into eyes.
- Care should be taken when using scissors to cut holes into cardboard boxes.
- When using household items please read the safety information provided by the manufacturer.

Please make sure you read our safety notice prior to starting any investigations.
This part of the challenge will allow us to investigate how light works by building a Camera Obscura!
The Obscura camera was first presented to the Royal Society by the scientist Robert Hook in 1694 but the idea of light passing through a small hole and being projected upside down has been around since 400BC!
The idea, is that when it is bright outside, light enters through the small hole in the box, travelling in a straight line, and projects and upside down image onto the opposite wall! Welcome to upside down world!
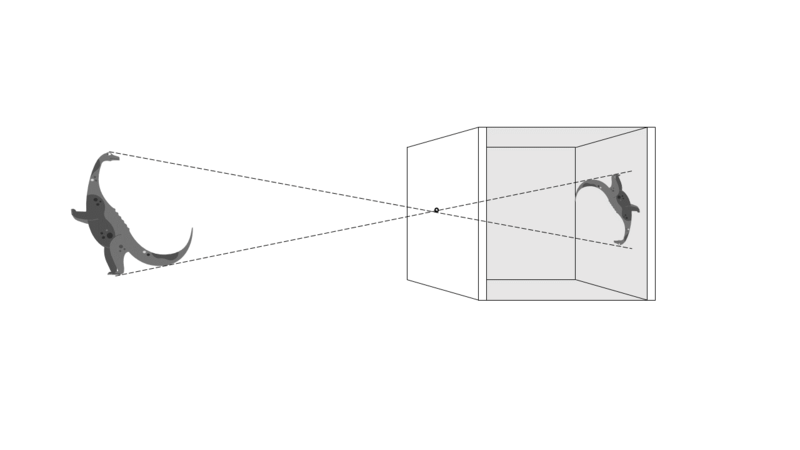
The Camera Obscura was first used, and is still used today, as a tool to view a solar eclipse without damaging the eyes. It was also historically used as an aid to drawing - the subject would pose outside, and the inverted image reflected onto a piece of paper that the artist would trace.
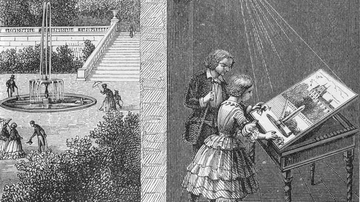
Image from - https://www.britannica.com/technology/camera-obscura-photography
This experiment needs you to get hold of the following items -
- Cardboard box
- Scissors
- White paper
- Tape (preferably dark tape - but sellotape will do)
1. Make the screen - Cut a piece of white paper to fit inside your box and use tape to attach it inside. This will be the screen that you project images onto!
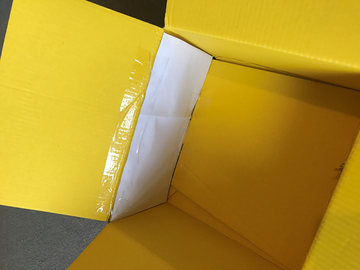
2. Make the holes - You need to make two holes in the side of the box, directly across from the screen. One hole should be very small, just poke the tip of a pen or pencil through the box. The second hole will be your viewing hole. This one can be bigger - just big enough for you to see into the box. The holes will also need to be far enough apart so that when you look through the viewing hole, your head won't block the light entering the smaller hole.
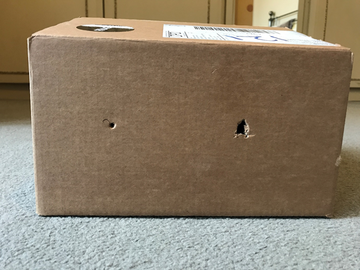
3. Close it up, tape it shut! - Close your box and tape it shut using (ideally, dark) tape. When you look into your box, you shouldn't be able to see any light leaking in from around the edges. Use more paper and/or tape to cover any corners which might be leaking in light.
4. Use the Camera Obscura - You are now ready to test your Camera Obscura! Stand with your back to the scene you'd like to project into the box and hold your eye to the viewing hole. This will work better if you are in a darkened room with a bright light behind you, standing in a dark room with your back to a bright window is a good place to start. With a little adjusting of angle, you should be able to see your inverted image inside the box!
Now that you've got the hang of this, carefully hold a mobile phone camera to the viewing hole and take a photo of the obscura image inside the box!
Take your camera obscura outside and try to get the best picture! Send in your photos and we will share some of our favourites during the a Live Meeting for everyone to see!
Here are some photos that our team took using our Camera Obscuras
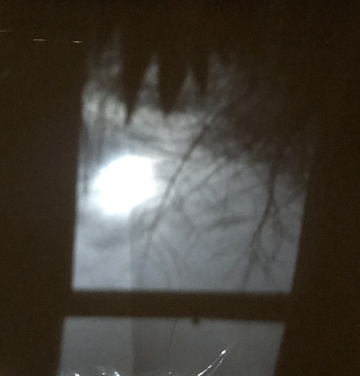
This first picture is showing the inverted image of the sun and tops of the trees outside the window!
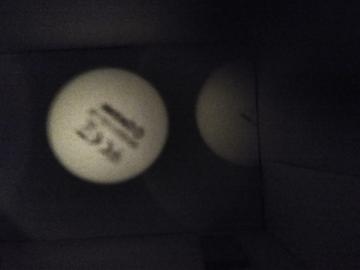
This is from Emily, this is the writing on a light bulb captured inside her Camera Obscura!
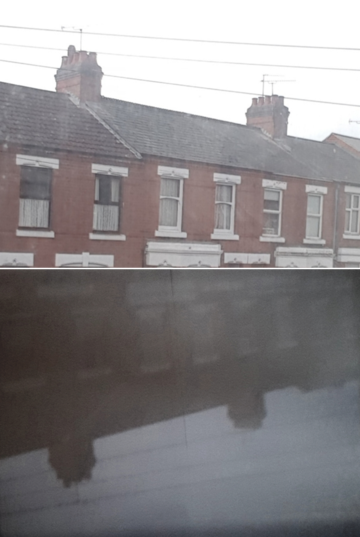
This picture was taken by Sofia and here, you can see the street outside her window above and the inverted image of this inside her Camera Obscura below!

We all use a variety of types of lighting in our homes, but how exactly are these bulbs producing light?!
Traditional "incandescent", filament light bulbs look like this, and we use many of these around our home in lamps and ceiling lights -
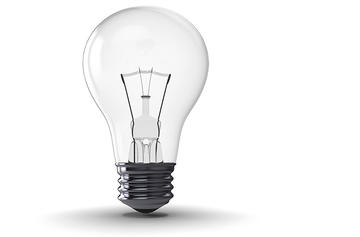
This type of light bulb works by heating the filament until it glows! This is pretty cool, but also means that we are actually wasting most of the energy through heat. To try and reduce this energy wastage, it is becoming more common for us to use different types of light bulbs which are more energy efficient. One type of light that is more energy efficient is called an LED.
LED stands for Light Emitting Diode - the Light Emitting bit is easy enough to understand. But, what does diode mean?! To understand what a diode is and what it does, we need to understand a little bit about electricity.
Electricity is the flow of charged particles, such as electrons, which are negatively charged. An electric current is the flow of electrons around a circuit. We can have materials which we know as being -
- Conductors - which allow current flow through freely
- Semiconductors - which only allow free moving current under certain conditions
- Insulators - which do not allow a current to flow through it at all
An LED is made up of two semiconductors, one is full of positively charged particles called "holes" and the other is full of negatively charged electrons. When power is applied to the circuit, the charged particles are able to move across the each semiconductor and join up! When the negatively charged particle and the positively charged particle joins, they release a package of light energy - a photon!
The rate at which the photons are released is directly linked to the frequency of the mains power supply, because this is related to how quickly an electron and hole can join up to form a photon. As a result of this, LED lights flicker on and off. We cannot see this because it happens faster than our eyes can register, but a phone camera will be able to capture this!
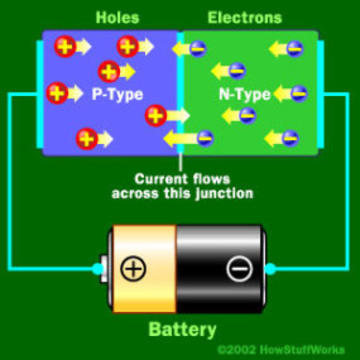
Image from - https://electronics.howstuffworks.com/led.htm
For this experiment you will need -
- A camera which can record in slow motion
- LED light - this can be from a variety of sources!
- Firstly, you want to get your LED light switched on.
- Using your camera phone in slow-mo mode, (or normal mode if this isn't an option) film the LED light for 10 seconds.
- Play back the video, you should be able to see a black line move across the screen - this is the flicker effect of LED lights! It's amazing to think that every LED light is doing this all the time, but our eyes cannot see it happening!
Now that you've got the hang of viewing the flicker effect using your video camera, let's try different types of lights and find out if we see the same effect!
- LED lights that are attached to the mains power ie. lamps, ceiling lights or plugged in lights.
- LED lights operated by battery
- LED lights in a car headlamp
Do we see the flicker effect for other types of lights?
Try filming other energy saving bulbs around your home and see if the flicker effect is happening with any of those!

For this experiment, we will be splitting light by creating our very own diffraction grating!
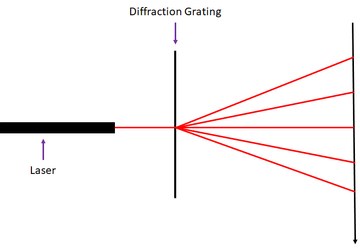
A diffraction grating is a material with many, very fine slits in it. As light hits the diffraction grating, it is split through the slits and we can see this coming out the other side of the grating.
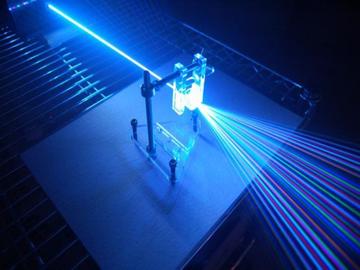
Image from - http://physicsopenlab.org/2017/08/29/laser-diffraction-grating/
The picture above shows a really powerful laser being split by a very sophisticated diffraction grating. Using CD's and a simple laser pointer/pen we will still be able to see the light being diffracted through the gratings of the CD.
Since a CD is made up of a spiral grooved track in a mostly parallel pattern, in a similar way to a traditional diffraction grating, we can use this as our diffraction grating!
For this experiment you will need the following -
- Laser pointer/pen*
- Old/blank CD
- Ruler/Tape measure
- Sellotape
- Clothes pegs
* Laser pens might not be something we usually have around the house, but we can purchase a little one from eBay or Amazon for around £7-10
**Safety notice! - Laser pointers/pens can cause serious eye damage if pointed or reflected directly into someone's eyes, so do not play lightsaber battles with your siblings and only use in the supervision of an adult!**
1. Peel the back off the CD - firstly, you will need to scratch the matt side of the CD (not the shiny side). We found that using a penny worked quite well for this. Then, stick a piece of sellotape on the CD over the scratched area and rub on firmly. Peel off the sellotape and this should start to pull the cover off the CD. Add another piece of sellotape and repeat the process over and over until the CD is completely see through.
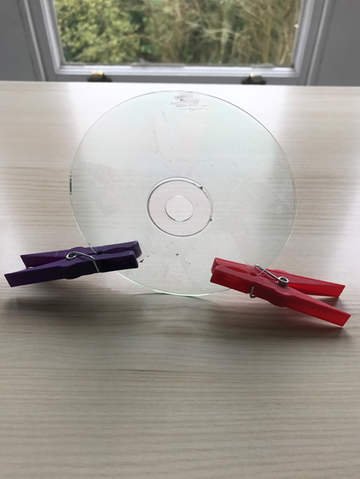
2. Prop up your CD using two clothes pegs, measuring them 30cm away from the wall.
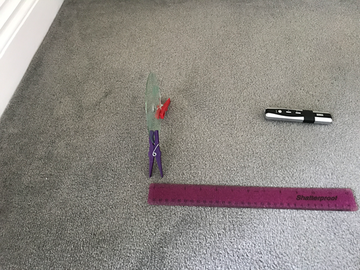
3. Hold the laser another 30cm away from the CD, meaning that the laser is now 60cm away from the wall.
4. Turn on the laser and with a little adjustment to where you point it, you should see the diffracrtion of light. This will appear as one large spot in the middle and two smaller spots either side (like the picture below). Measure the distance between the spots using your ruler, this should give you an idea of the track spacing of the CD. We should see a larger distance between the spots if the disk has larger track spacing.
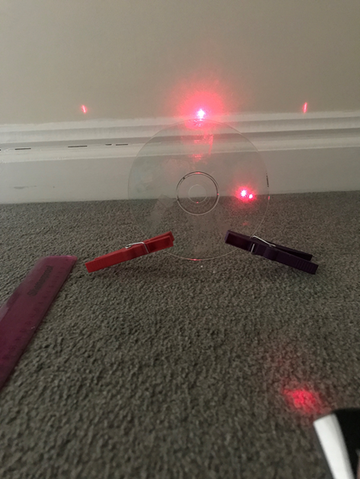
Test the same experiment using different types of discs, do you see a difference distance of diffraction spots with a DVD, or a blu-ray disc?
Send us pictures of your diffraction spots!
Safety notice - Don't use your parent's favourite blu-ray films for this experiment, or your sibling's favourite video game - that will not end well!

On the research page, we have already looked at how sunscreens protect our skin from harmful UV light. As a brief recap, we should remember that sunscreens act as a protective barrier between our skin and UV light. They offer protection in a number of ways, for example, some ingredients may absorb the UV light, and others may reflect the UV light.
In this experiment, we will use UV beads to investigate the effectiveness of sunscreens against UV in sunlight. UV beads are coloured when exposed to UV and colourless in the dark.
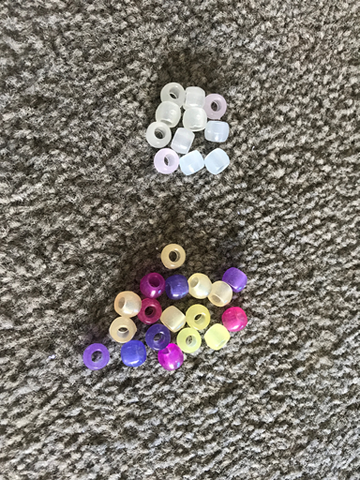
The picture above shows a picture of UV beads which have been in a dark box (above) and UV beads which have just been exposed to pure UV light bulbs (below). The difference in colour is very contrasting so we will use this in our investigation of the sunscreens!
1. UV Beads*
2. Clear, colourless plastic bags
3. Selection of sunscreens - using old bottles from last summer is fine, no need to buy brand new bottles unless you don't have any at all.
4. Sunny windowsill or sunny spot in the garden
*UV Beads might be something you don't normally have at home, but they can be purchased on eBay or Amazon for around £2-4 for a small bag. Afterwards, you could use them to make some pretty jewellery!
1. Take several of the UV beads and place them into a clear, colourless plastic bag. Label this bag number 1. This will be your "unprotected bag" with no sunscreen coating so that you can compare the other sunscreen bags with this.
2. Take several UV beads and place them into another plastic bag. Label this bag number 2. Spray or rub (depending on what type of sunscreen you're using!) the sunscreen onto the surface of the plastic bag that will be exposed to sunlight in your sunny spot.
3. Repeat step 2 with any different sunscreens you would like to test. Labelling each one a different number so that you can keep track which sunscreens are coating which plastic bags.
4. Place all the plastic bags in the same sunny spot and leave them for 15-20 mins in the sunshine.
5. Return to your experiment and rank each bag in order of most colourful to least colourful. The least colourful bag has been coated in the most protective sunscreen.
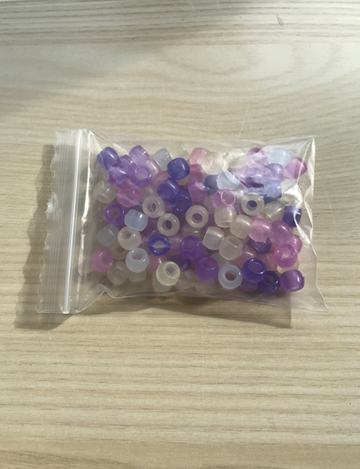
There are a number of different ways this experiment could be expanded! A few ideas to get you going -
1. Do different brands of sunscreens offer better protection? You could test a range of different branded sunscreens to identify the most protective.
2. Do SPF numbers affect the protectiveness of a sunscreen? You could conduct another experiment using the same brand of sunscreen, but with different SPF numbers to see if there is any visible difference in protection from UV using the UV beads.
3. Is there a difference between conducting the experiment in a windowsill or outside? You could try conducting the same experiment indoors and outdoors.
4. How does pure UV light from a UV light bulb compare to UV from the sun? You could expose the UV beads to a pure UV light bulb (the UV lamp from my gel nail kit is ideal!) for the same amount of time as the sun and observe the difference in colour.
5. How effective are the sunscreens at protecting against pure UV light from a UV lamp? You could conduct the experiment again using a UV lamp.
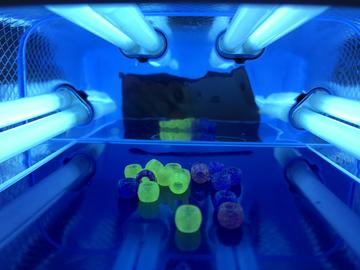
Picture shows UV beads inside a UV lamp box from a gel nail kit.

Now that we have done the experiments to investigate light let's think about what we saw and see if we can answer the following questions for each experiment.
Camera Obscura
- Was it easy to project an image inside your Camera Obscura?
- Were all your images black & white or did you see colour? Why might this be?
- Can we think of any ways to improve this experiment?
Flicker Effect of Lights
- What type of light did you use to observe the flicker effect? - Did different types of light flicker at different rates?
- Did you try filming the light at normal speed as well as slow-mo? - Were you able to observe flickering at normal speed?
- Did you try filming any different coloured lights and observing the flicker effect? - Did the colour of the light effect the speed of the flickering?
DIY Diffraction Grating
- Were you able to measure the distance betweent the diffracted spots? - Did any alterations to the setup cause this distance to change?
- Did a different coloured laser pen give different spacings between the spots? - Why do you think this might be?
- Did you observe any change in the distance between the spots for different types of discs? - Why do you think this might be?
Testing Sunscreens for UV Absorption
- Which sunscreen brands did you try? Was there any difference in UV protection between them?
- Did you try different SPF value sunscreens? Was there any difference in UV protection between them?
- Was there any difference in UV absorption between UV beads in sunny spots outside vs inside? Why do you think that might be?
Discuss these questions with your friends also taking part in the challenge, or with your teachers, or family! If you have any unanswered questions, remember that you will have the chance to ask us at one of the Live Online Events!
